Cleaning your airbrush: 5 tips for perfect maintenance
- Mario Romani

- Feb 4
- 3 min read
It's a topic I'm regularly asked about, and it sometimes scares those who are new to this technique, convinced that it's a complex or mechanically risky operation.
Indeed, with care and a good dose of practice, your airbrush won't give you any problems. You certainly need to get used to the idea that it's a mechanical tool with no electronics or sophisticated digital features, and this can be confusing for the user. It's undeniable that when you're used to installing apps on tablets or phones that you take in for repair if they don't work, you'll find yourself confused by a recalcitrant tool when you want to get paint out and it just won't work.
I'll help you tackle small everyday problems with a few tips, and you'll see that you can handle them excellently.
1) Learn how the airbrush works
You can't think of using this tool without understanding how it works and knowing what to do when it acts up.
I'm attaching an exploded view of a generic airbrush with Japanese mechanics, and I'll give you some pointers on what the main components do when you use it.
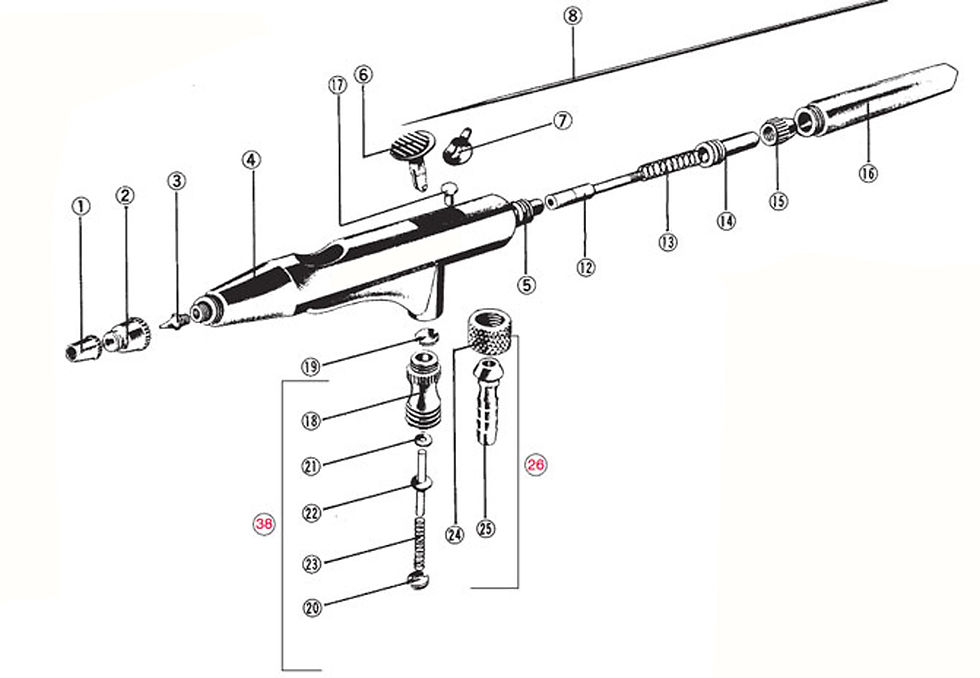
In fact, you don't need to know all the parts (such as, for example, all those that make up air valve no. 38, which in reality is never disassembled and can be removed in its entirety if necessary).
The airbrush works simply: compressed air from the compressor passes through the air valve when you press button (6), opening the flow; this draws the paint from the tank, slides it along needle (8), and atomizes it onto the tip of the needle emerging from nozzle (3).
If the color doesn't come out, there's no need to dismantle everything initially, but you need to selectively rule out, one by one, the causes of this inconvenience.
First check that the screw (15) is tightened properly. If it is not, the needle is not aligned with the movement of the button, it does not move, it does not clear the nozzle opening and does not allow the paint to come out.
As a second option, check that the paint has not dried on the tip or that the crown (1), which protects the tip of the needle, is not dirty with dried paint. Remember that without the crown (1) the airbrush will still work, but without the cap (2) it cannot work.
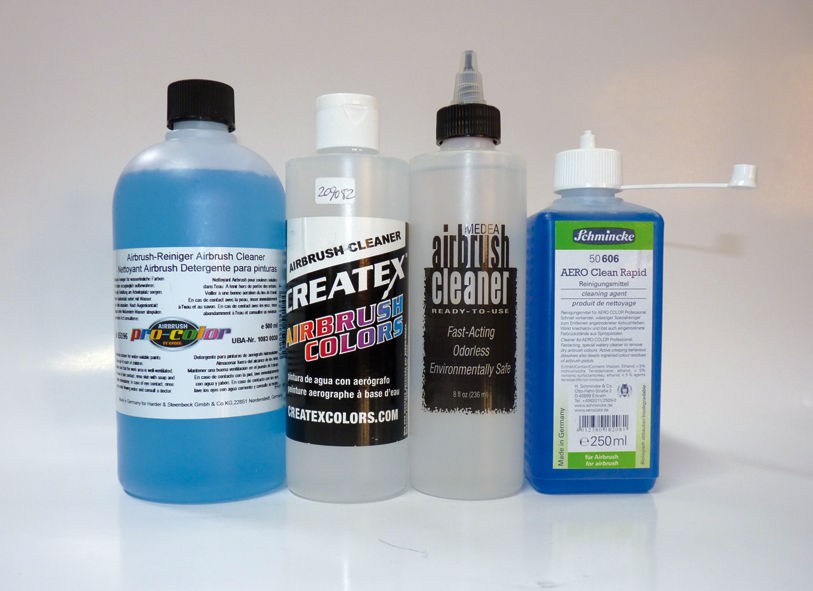
2) Perform regular cleaning with suitable cleaners
To clean the airbrush, you don't need to constantly disassemble it. Simply keep the duct from the tank to the tip clean by spraying cleaners compatible with the colors used:
acrylic cleaner if you use acrylic paints
alcohol cleaner if you use alcohol-based paints
solvents if you use nitro-based paints or other solvents
Don't mix them together and don't use cleaners whose reaction with the colors you're using isn't known to you: the colors can clash, separate, and leave a rubbery mess inside the duct, forcing you to disassemble everything and waste a lot of time removing the dirt.
3) Disassemble the airbrush only if necessary
The proper functioning of the airbrush is the result of correct maintenance and a good state of conservation of the fundamental parts such as the needle (8) and nozzle (3).
It doesn't need to be completely disassembled several times a day when it's working properly. Repeated mechanical stress on the threads can, over time, damage them, especially the very small nozzle threads.
To prevent the paint from drying and acting as a glue, use a specific airbrush lubricant on the threads and apply it every time you completely disassemble the instrument.
4) Don't use brushes that are too big
When cleaning the inside of the duct, using brushes that are too thick can scratch the internal thread of the airbrush body (in airbrushes with Japanese mechanics), making it difficult to screw the nozzle back on.

5) Always reassemble the airbrush following the diagram
Your airbrush's schematic is essential for reassembling all the parts in the correct direction without forgetting anything. Each piece must be oriented correctly: for example, the tab (7), if mounted backwards or upside down, prevents the button from moving back smoothly.
If you stick to these simple rules, your approach to airbrushing will be correct and you will avoid many inconveniences.


Comments